

This week for the enclosures project, I wanted to use the principles we learned this week regarding standoffs and enclosures for components. I went the cheap option (ie FREE) and used the supplied hardware and components in the shop and found scraps of wood to cut on in both the Maker Space and ITP Shop.
I used a digital caliper to measure the hardware and then drew a vector illustration in Adobe illustrator to build out the shape and wanted to include instruction for the chosen switch. I went with a hexagon shape and created inlets for the hardware as well.

1. digital caliper
to measure hardware

2. recorded measurements
of hardware and component requirements

3. illustrator design
to print/engrave/cut via laser printer

4. laser-cut/etch
front of birch wood

5a. laser-etch
reverse side of top of enclosure for hardware inlets

5b. laser-etch
reverse side of bottom of enclosure for hardware inlets
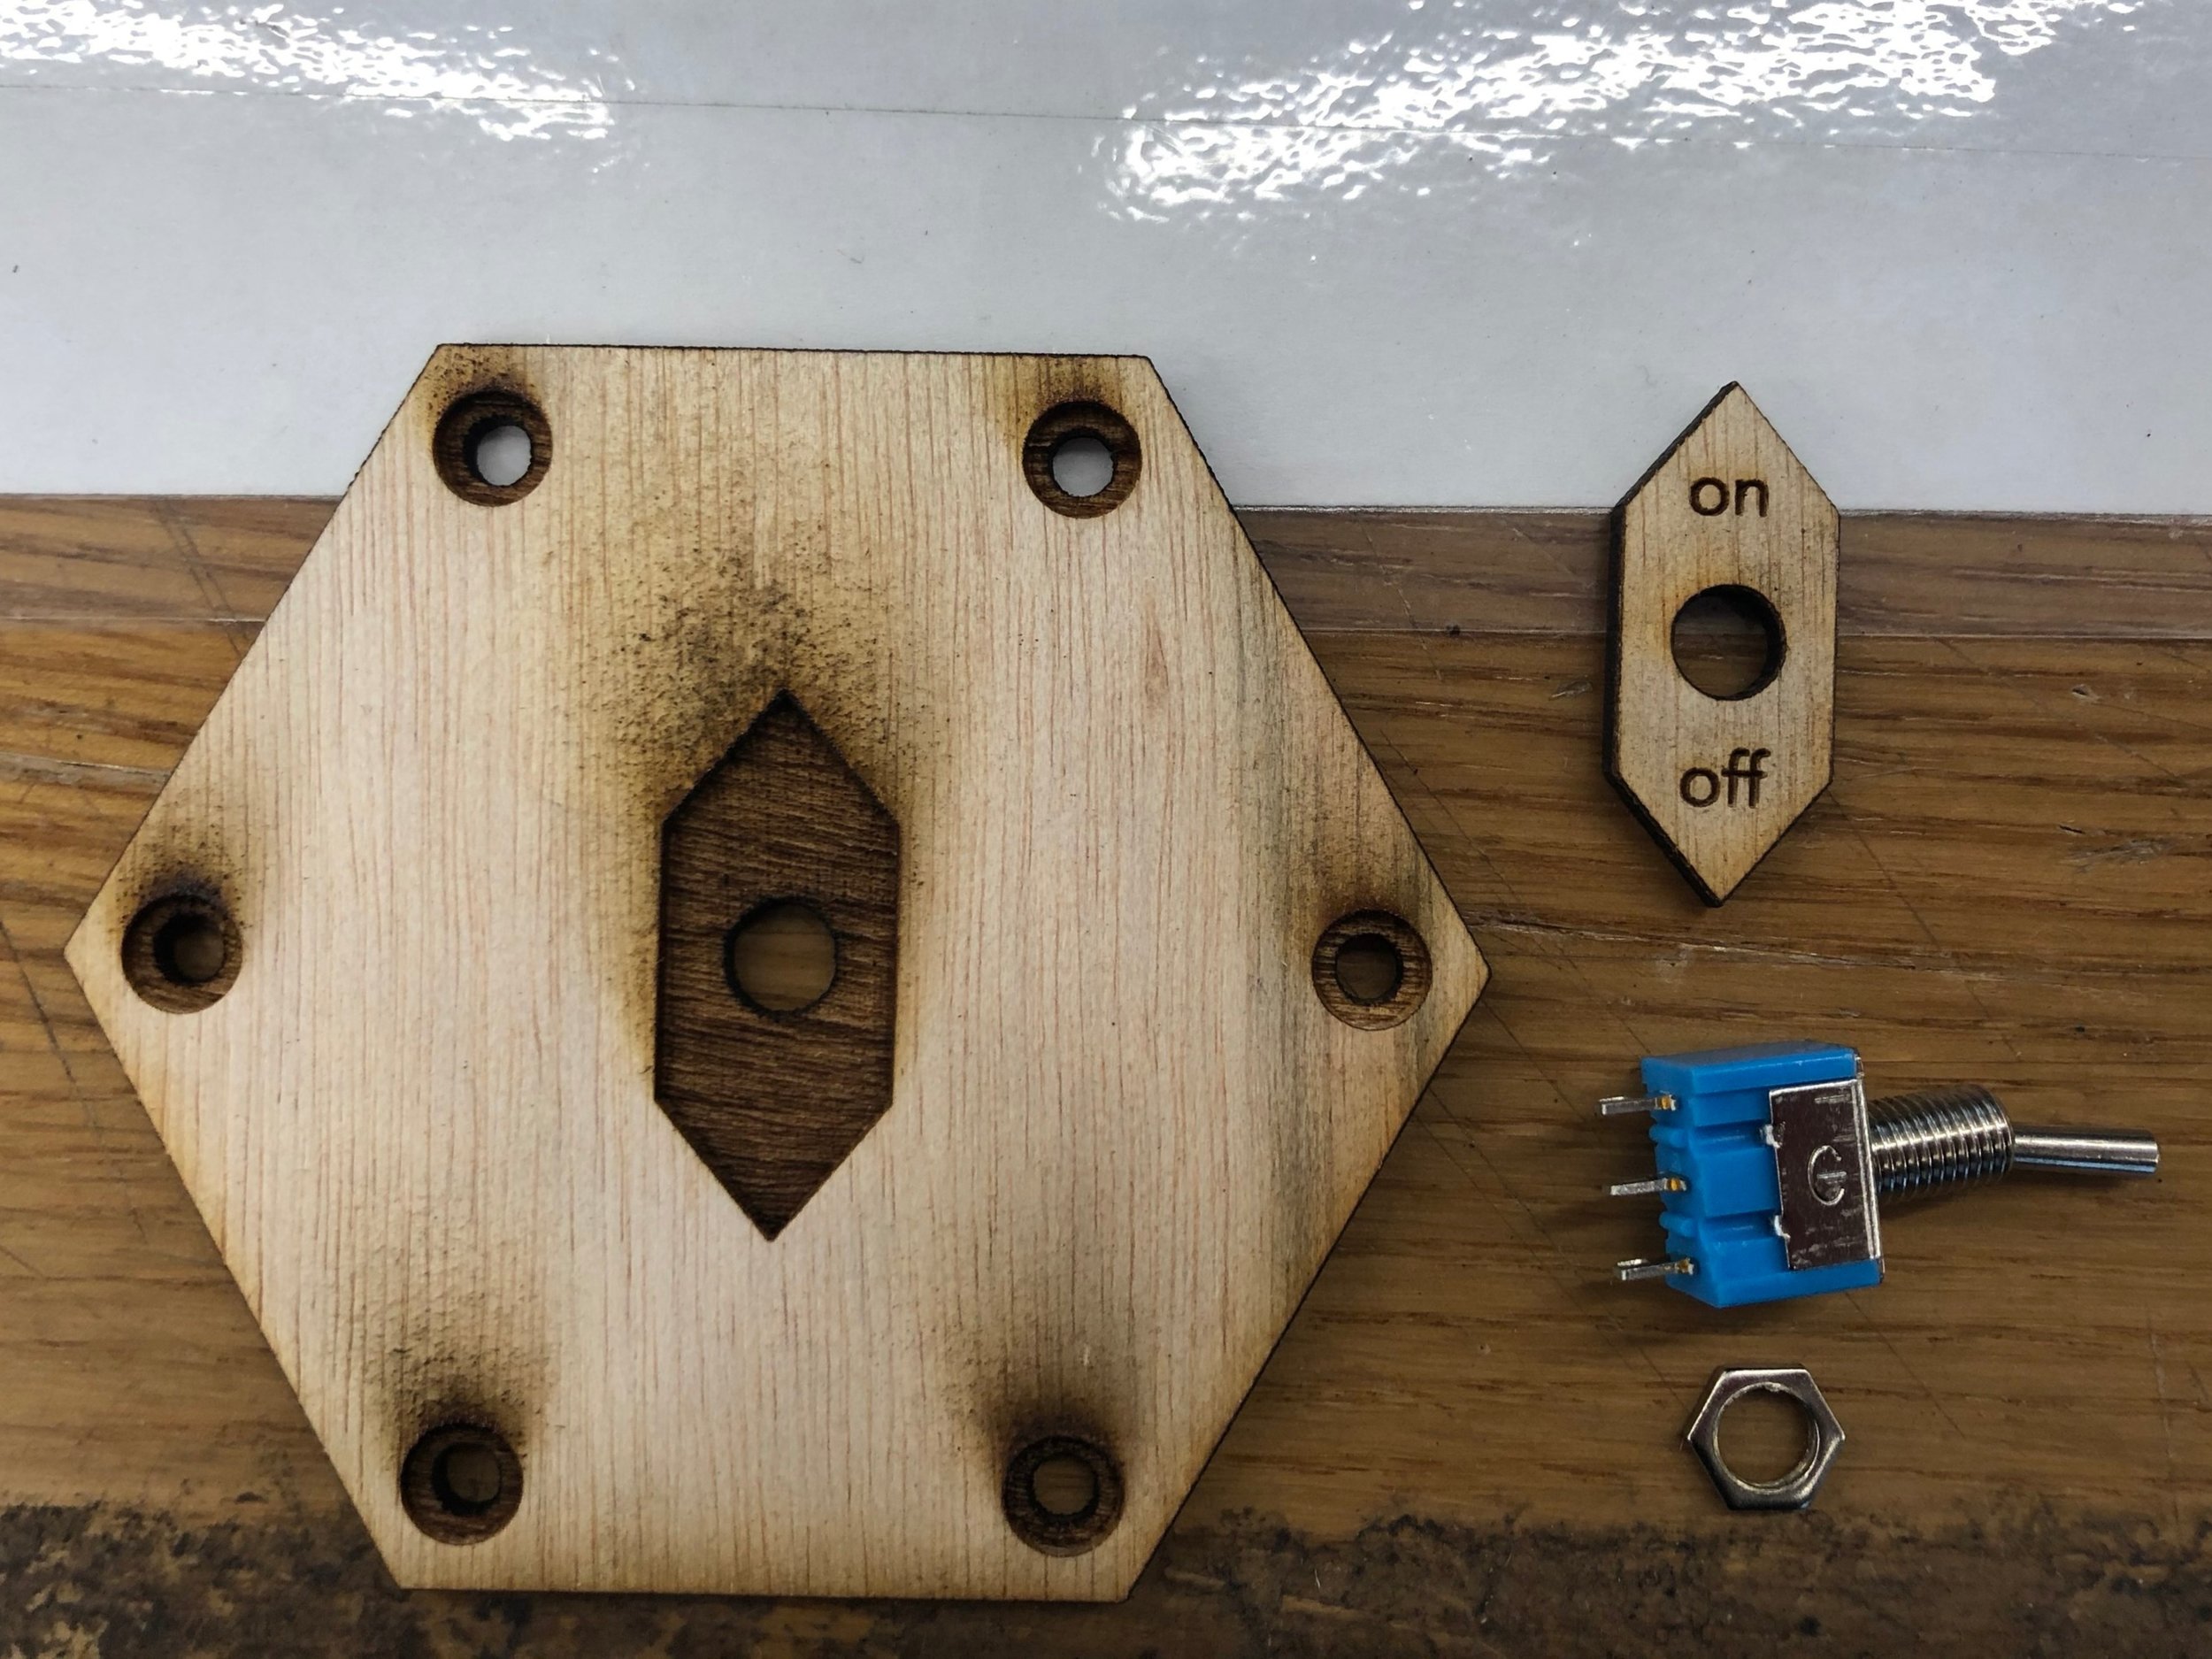
6a. assemble top of enclosure
switch and labeled indicator

6b. assembly of enclosure
with standoffs

6c. assembly of enclosure
with switch/indicator

7a. complete assembly of enclosure
with bottom

7b. complete assembly of enclosure

7c. complete assembly of enclosure
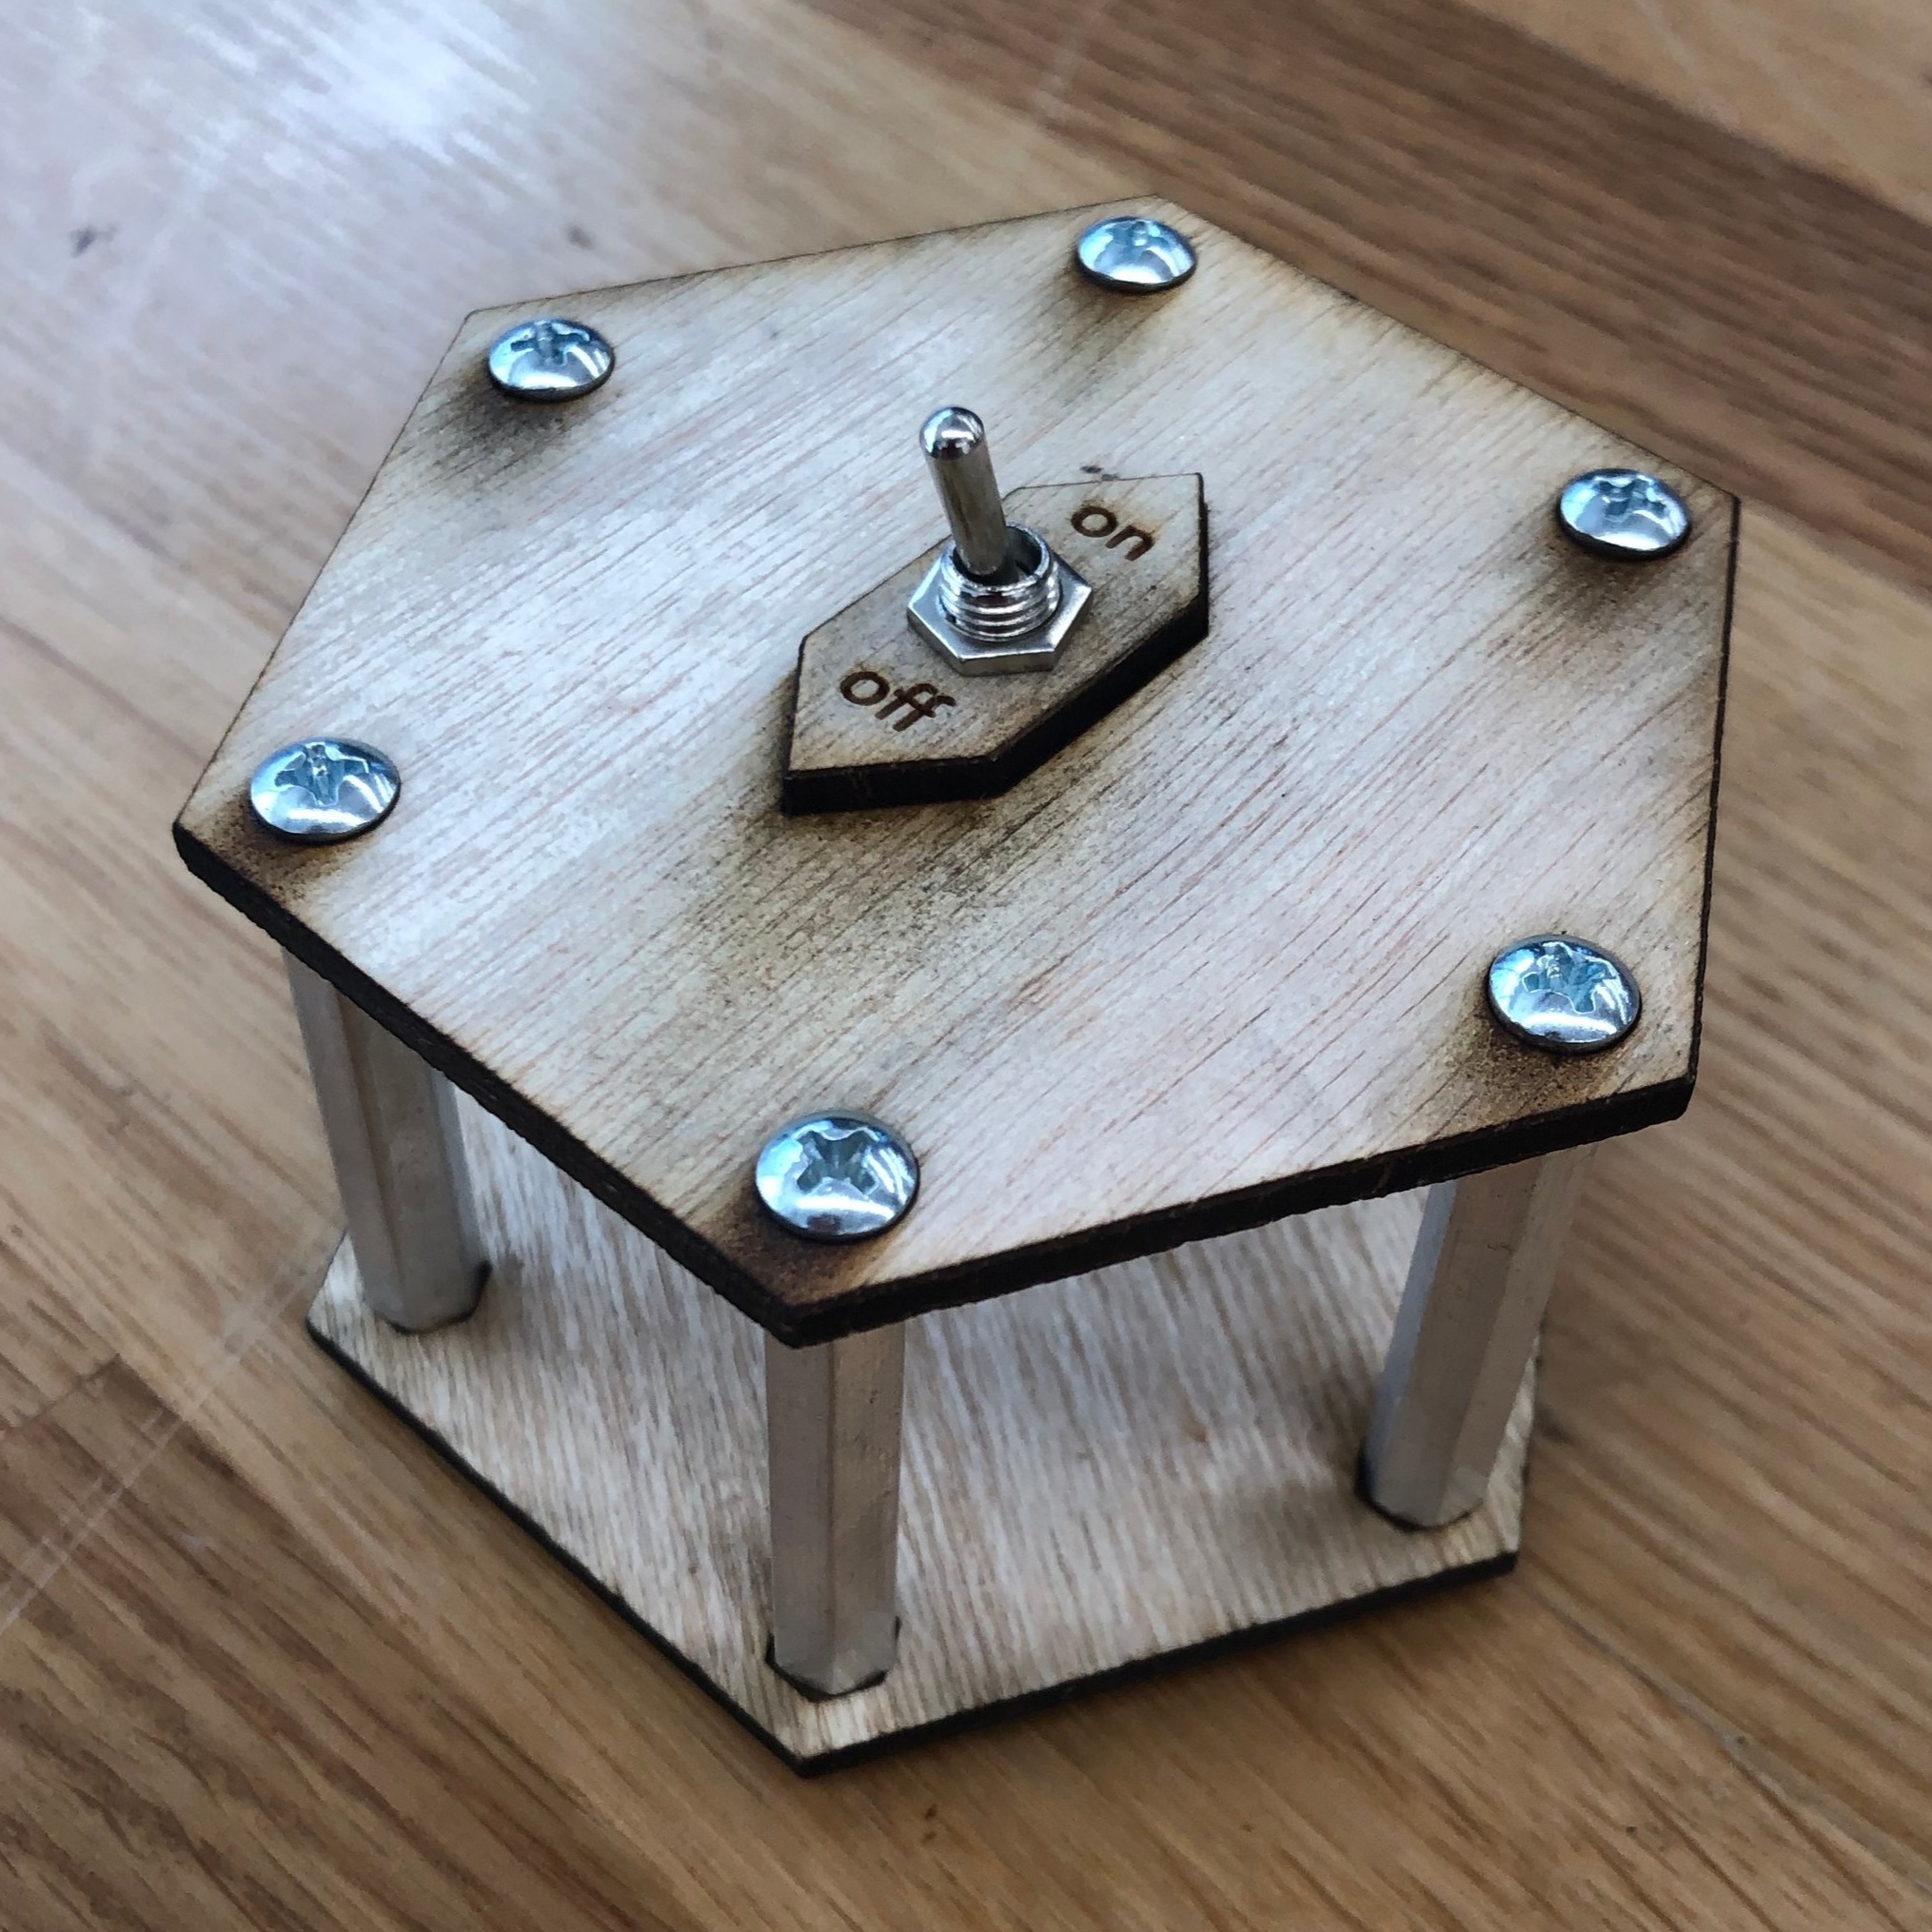
7d. complete assembly of enclosure