This week in Light & Interactivity, our challenge was to emulate a candle using an Adafruit Jewel RGBW 7 pixel LED component. The focus of the experiment was to examine the flame of a traditionally lit camera and do our best to emulate the look and feel of the flame.
In the last class, we examined how light travels in different materials. We found that horizontal channels where light can escape allows for a vertical expression. For example, in one of Tom Igoe’s projects, he used an acrylic tube with horizontal grooves to create a chimney that would allow for the flame to display in a vertical shape as opposed to the light just escaping through the top.
Another example would be that in my project from the previous week, the light source entered the fiber optic from one end and was visible at the other end. When I took a knife to the optic channel, the slit allowed for light to escape and peer through. This had me thinking around my past stackable acrylic projects, making three dimensional objects out of 2.5 dimensional cuts (from the laser cutter).
I decided that I would have some luck with a very fabricated enclosure for the encapsulated light and took my attention into Google’s Poly Site to see what three dimensional flame or candle objects i could find. I found a candle that had a flame that felt like a doable solution by an artist named Jarlan Perez. I downloaded the obj file and brought it into Vectorworks to examine the file and use the extrusion tool to create slices for a 1/16” sized acrylic (.040 in / ~ 1mm).
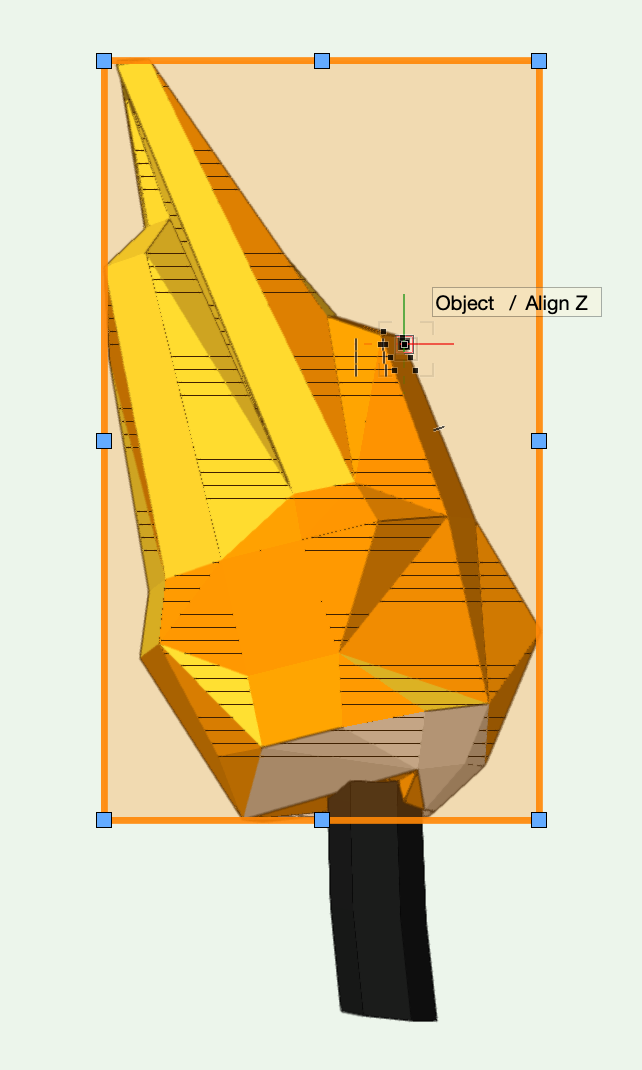
I knew I wanted a specific aesthetic, and realized that when I used the extruder tool in Vectorworks, the program was not catching all of the edges of the design and was going to take a lot of design time to attempt to make it work to have a viable design to use on the laser cutter (image below). I remembered a tool that Danny Rozin had mentioned in my Digital Fabrication course called Slicer by Fusion 360 and quickly switched paths and began to work out the layout of my design within this tool.
Slicer is an incredibly powerful and smart tool, mostly. There are some settings that allow you to choose the materials and will also give you an assembly plan in the process. I first attempted to update the adjusted flame object that I created in vectorworks from the original candle image. The mesh had some inconsistencies which caused Slicer to reject the file. I reverted to using the original file I downloaded from Google Poly and uploaded into Slicer and began to plan out my assembly.
I exported the assembly parts to ESP files and decided to only use a specific number of parts and parsed through the 40 extracted files manually to collect all usable parts numbered 250 - 320 to then take to a single Artboard in a new illustrator file. From here I tested on cardboard and scrap acrylic to make sure the settings were accurate and in working order.
usable parts to assemble flame
I went to Canal Plastics in Manhattan to acquire the thinnest known-good acrylic I could find (~1 mm) and brought that back to the laser to cut. A happy accident, yet definitely not intended was a smoky appearance on the edges of the acrylic. This was caused by layering a piece of paper under the acrylic and thicker matte board (to catch the little pieces). This caused a bit more air to be pocketed between the materials and made it difficult for the machine to vacuum out the smoke as quickly as normal (without the hinderance).
I also purchased a half-sheet (6” x 12”) piece of opaque white acrylic at 1/8” to cut the top to fit into the adaptable enclosure I made the previous week. I cut the exact same shape from the existing plan and augmented an outlet shape to connect the flame to the enclosure top. In addition to the acrylic pieces, I also cut out circular pieces to enclose and connect the Adafruit jewel to the acrylic flame to prevent leaking of the light. I used Gorilla Wood Glue and and Acrylics Gel to assemble the matte board and acrylic parts together.
For programming, I used a slightly augmented version of Tom Igoe’s WS281xCandle code to emulate the flame. I will admit that I focused a bit more on the physical aesthetic more so on the programming for this project. I found that if I increased the intensity of the flame and the variant degrees of adjustment, the flame faded a bit more drastically. However, it seems that it’s not as drastic as it could be, so I will take some further looks into the code this week if more time allows. Code below:
#include
const int ledPin = 6; const int pixelNum = 7;
Adafruit_NeoPixel flame = Adafruit_NeoPixel(pixelNum, ledPin, NEO_GRBW + NEO_KHZ800);
unsigned int hue[pixelNum]; int sat[pixelNum]; int intensity[pixelNum];
void setup () { randomSeed(analogRead(A6));
for (int p = 0; p < pixelNum; p++) { hue[p] = random(2000, 5000); sat[p] = random(192, 255); intensity[p] = random(142, 255); }
flame.begin(); flame.clear(); flame.show(); }
void loop () { for (int p = 0; p < pixelNum; p++) {
int hueShift = random (-1,2);
hue[p] += hueShift;
hue[p] = constrain(hue[p], 800, 8000);

int satShift = random (-2,2);
sat[p] += satShift;
sat[p] = constrain(sat[p], 192, 255);

int intensityShift = random (-2,3);
intensity[p] += intensityShift;
intensity[p] = constrain(intensity[p], 20, 255);

unsigned long color = flame.ColorHSV(hue[p], sat[p], intensity[p]);
unsigned long correctedColor = flame.gamma32(color);
flame.setPixelColor(p, correctedColor);
}
flame.show(); delay(1); }
Once I had this in a working formation, I glued the light to the box top and turned the lights in the room a bit more dim. I think I got a pretty decent emulation of a flame due to the intensity shift and the smoky edges of the thin acrylic parts stacked. I like the shape of the LED flame within the structure of acrylic flame and even like the light glow that I get through the white acrylic. All and all, I’m pretty pleased with the outcome of this project.


